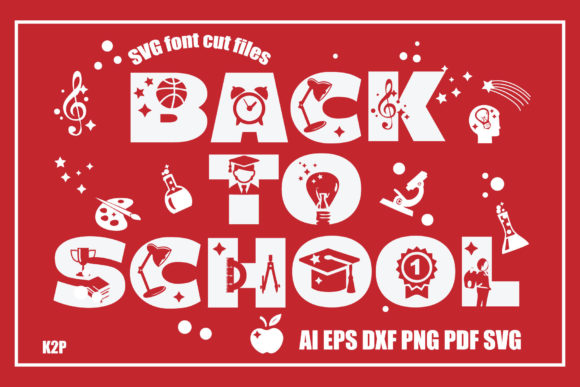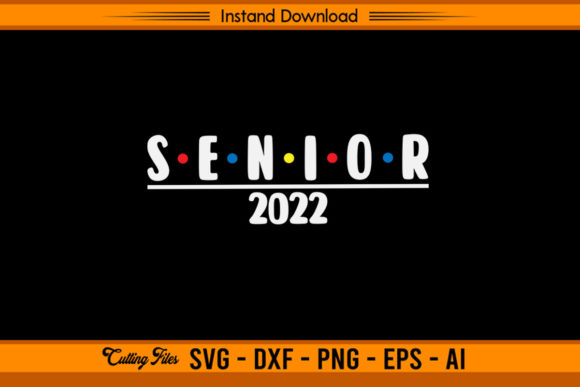
Senior 2022 – Back to School: Streamlining Your Creative Production Workflow with Instant-Use Cutting Files
For creators, small business owners, and anyone who regularly produces custom apparel, gifts, or promotional items, the gap between a design concept and a finished product is where most of the real work happens. You can have the perfect idea, but if the file format is wrong, the resolution is low, or the artwork requires hours of manual cleanup, that idea never makes it past the screen. The Senior 2022 – Back to School set of SVG, PNG, AI, EPS, and DXF cutting print ready files is designed to close that gap completely. This is not a generic clipart pack. It is a production-ready asset that fits directly into a proven workflow for cutting machines like Cricut and Silhouette, allowing you to move from download to finished item without unnecessary friction.
Whether you are fulfilling a last-minute order for a high school senior’s party, creating a batch of welcome-back gear for your own classroom, or building a small inventory of spirit items for a local sports team, understanding how to integrate these files into your process can save you substantial time and reduce material waste. This article walks through what you get, how the files interact with your existing tools, and how to organize your workflow around them for consistent, repeatable results.
What the Senior 2022 – Back to School Set Includes and Why the Format Matters
When you purchase this digital download, you receive a compressed ZIP folder containing five separate file types: one SVG, one AI, one EPS, one PNG, and one DXF. Each format serves a distinct purpose in a modern cutting and print workflow, and having all five means you are covered no matter which software or machine you use. The SVG (Scalable Vector Graphic) is the most versatile for Cricut Design Space and many other design applications because it preserves sharp edges and allows you to resize the artwork without losing quality. The AI (Adobe Illustrator) file is useful if you need to edit individual vector paths, adjust colors, or combine the design with other elements before exporting. The EPS (Encapsulated PostScript) file is a reliable fallback for legacy design software and professional print shops that request vector files in a standard format. The PNG (Portable Network Graphic) is a high-resolution raster image with a transparent background, ideal for mockups, quick previews, or printing on items where a raster design is acceptable. Finally, the DXF (Drawing Exchange Format) is widely supported by Silhouette Studio and other CAD-like cutting applications, making it a direct import option for users who prefer that environment.
It is important to note that this is an instant download only. No physical product is shipped. You receive the digital files immediately after purchase, and no watermark appears on any of the illustrations. The resolution and detail in the downloaded files are significantly higher than what is shown in the presentation images. This is a common point of confusion for new buyers, but the actual assets are production-grade. If you have ever attempted to upscale a low-resolution preview image for cutting, you know the frustration of jagged edges and misaligned cuts. That is not an issue here.
Fitting the Files into Your Pre-Production Workflow
Preparation is the stage where most cutting projects succeed or fail. Before you even open your cutting machine software, you can take a few steps to ensure the Senior 2022 – Back to School files integrate smoothly into your routine.
Start by unzipping the folder and organizing the files into a dedicated project folder on your computer. If you work with multiple cutting machines or collaborate with other creators, keep all five formats accessible. For example, you might use the SVG in Cricut Design Space for a t-shirt design today, but next week you might need the DXF for a Silhouette project using a different material. Having the full set available means you never have to search for or convert a file later.
Next, open the PNG version to verify the design’s overall appearance and color palette. Because PNG is a raster format, it is also useful for placing the design onto a mockup of your chosen item — a t-shirt, hoodie, mug, or tote bag — before you commit to cutting. This step is especially valuable if you are fulfilling an order for a client or creating a sample for approval. The transparent background allows you to layer the design over product photos in Canva, Photoshop, or even a presentation slide, giving you a realistic preview without wasting material.
If you anticipate needing to tweak the design — adding a name, changing a color, or combining it with other graphics — open the AI or EPS file in vector editing software such as Adobe Illustrator, Affinity Designer, or Inkscape. Because the file is vector-based, you can modify individual elements without degrading quality. This is a significant advantage over using a flattened PNG for editing. For instance, you might want to change the “Senior 2022” text to match a specific school color or resize the graphic to fit a smaller phone case. Vector editing makes this a five-minute task rather than a struggle with pixelation.
Production Integration: Cutting, Weeding, and Pressing
Once your file is prepared, the next phase is production. The SVG and DXF formats are the most direct paths to your cutting machine. In Cricut Design Space, import the SVG file. The layers should come in cleanly, with paths grouped logically. If you have ever imported a poorly constructed SVG that layers incorrectly or has overlapping paths that cause double cuts, you appreciate the importance of a clean file. The Senior 2022 – Back to School graphics are designed to minimize these issues, but you should still check the preview in Design Space or Silhouette Studio to ensure all elements are recognized correctly.
One practical tip is to duplicate the design on your cutting mat to maximize material usage. If you are cutting heat transfer vinyl for a batch of hoodies, fitting three or four copies of the design onto one sheet can significantly reduce waste. Because the file is vector-based, scaling is straightforward — just be mindful of your material size and the minimum cut details for your specific vinyl type.
Weeding is the step where good file design shines. A file with too many small, isolated islands of material can make weeding frustrating and slow. The Senior 2022 design is constructed with typical weeding tolerances in mind. If you are new to cutting, start with a medium-sized version of the design — around 4 to 6 inches wide — to get a feel for how the details hold up. As you gain confidence, you can scale it smaller or larger depending on the item. For mugs or phone cases, a smaller version works well. For the back of a hoodie, scaling up to 12 inches or more can be effective as long as your heat press and blank allow for it.
When it comes to pressing, the PNG file can serve a secondary purpose: use it as a placement guide. Print the PNG at the exact size you will cut, then use it to position your transfer tape on the garment before pressing. This is a simple trick that reduces misalignment, especially if you are producing multiple items in a single session.
Post-Production and Quality Control
After pressing or applying the design, quality control is the final check. Examine the edges for any lifting or incomplete adhesion. The vector origin of the file means the outlines should be crisp, but machine calibration, material temperature, and pressure all play a role. Keep a test piece of the same material for any new batch run. If you are producing items for sale, consistency across multiple units is critical. A file like this one gives you a reproducible baseline; if the first item looks good, the next one should too, provided your machine settings are stable.
Long-term use of these files is straightforward because of the format variety. Store the original ZIP folder in a cloud drive or local archive. If you ever need to reproduce a design months later, you have the original, unmodified file. For ongoing projects — such as a small business that sells senior class merchandise annually — you can use the AI or SVG file as a template, swapping out the year and school name in future iterations. This turns a single purchase into a reusable workflow component.
Practical Use Cases Across Different Workflows
The versatility of the Senior 2022 – Back to School design goes beyond t-shirts. Consider these specific scenarios where the file set fits naturally into a production process.
For a teacher or educator preparing for the start of the school year, customizing a tote bag or tumbler with this graphic creates a personal touch that store-bought items lack. You can cut the design in iron-on vinyl for a fabric bag or use adhesive vinyl for a stainless steel tumbler. The PNG file is also useful for sublimation printing if you have a sublimation printer and appropriate blanks. Because the design is clean and centered on the senior theme, it resonates well with students and parents alike.
For a small business owner who sells custom apparel at graduation fairs or senior nights, this file can be part of a larger catalog. You can offer the design in multiple colorways by editing the AI or SVG file. If a customer wants the design in white on a navy hoodie, and another customer wants it in gold on a white t-shirt, you can adjust the fill colors in your design software before cutting. This avoids the need to purchase separate files for each color variation.
Marketers and event planners can use the PNG for digital mockups in social media posts or email campaigns to promote senior-themed products. Because the file is high resolution, it works well for online previews without looking pixelated. You can layer it onto a photo of a blank hoodie in a graphic design tool and post it to Instagram or your website store. This bridges the gap between the physical product and the digital marketing effort.
Hobbyists who enjoy making gifts for family and friends will find the file straightforward to use on a variety of items. The DXF format is particularly friendly for Silhouette users who prefer not to convert files in a separate program. Simply import, adjust size, and cut. The learning curve is minimal, which means you spend more time creating and less time troubleshooting.
Organizing Your Digital Assets for Repeated Use
One overlooked aspect of working with cutting files is digital asset management. After you download the Senior 2022 – Back to School set, take a few minutes to name the folder clearly and include relevant details such as the year, theme, and file types. If you collect multiple design sets over time, a consistent naming convention saves you from digging through dozens of folders later. For example, you might use a structure like “2022_Senior_BackToSchool_DesignSet” and then subfolders for each format. This is especially useful if you share your library with a team member or collaborator.
Backing up your files is also important. Digital downloads can typically be re-downloaded from your purchase history, but having a local and cloud backup ensures you can access the design even if your internet connection is slow or the store’s download link changes. Store the ZIP file as-is so you retain the original compression and file structure.
Compatibility Considerations and Software Choices
While the SVG file works in Cricut Design Space without conversion, users of Silhouette Studio may prefer the DXF file for direct import. If you use a different cutting machine — such as a Brother ScanNCut, a Sizzix, or a manual die-cutting system — the EPS or AI file can be converted using a vector application. The key is choosing the format that requires the fewest steps from import to cut. Reducing the number of conversions reduces the chance of file corruption or path errors.
For users who operate entirely within a mobile or tablet-based workflow, the PNG file with a transparent background is the most universally supported format across apps like Procreate, Canva, and various cutting machine companion apps. While you lose the ability to edit vector paths on a tablet, the high resolution of the PNG means you can still produce excellent results for many projects. If you need to resize significantly, however, vector formats are preferable to avoid pixelation.
Final Thoughts on Integrating the Senior 2022 – Back to School Files into Your Routine
The value of a well-prepared digital cutting file is measured not just in the quality of the design but in how seamlessly it fits into your existing process. The Senior 2022 – Back to School set delivers on both fronts. The variety of formats ensures that no matter what software or machine you use, you have a file ready to go. The design itself is clear, on-theme, and constructed with production tolerances in mind. By treating these files as a component in a larger workflow — from preparation and editing to cutting, pressing, and quality control — you can produce consistent, professional-looking items with less effort.
Whether you are fulfilling a single custom order, preparing a batch of gifts for the start of the school year, or building a product line for a small business, the time you save by using a ready-to-cut design directly translates into more time for the creative and strategic parts of your work. Download the files, unzip them into your organized project folder, and run a test cut on scrap material. Once you confirm the settings, you are ready to produce at scale. That is the kind of efficiency that makes a real difference in a busy workflow.